Here’s a tip if you want to make money from your Flutter applications: Build for iOS first.

This is the reason why you see most companies launch their iOS apps first, and push out updates first to iOS.
When you do build for iOS you need to add some way for users to spend their money in your app. Apple Pay is the most seamless way to do it.
What is Apple Pay
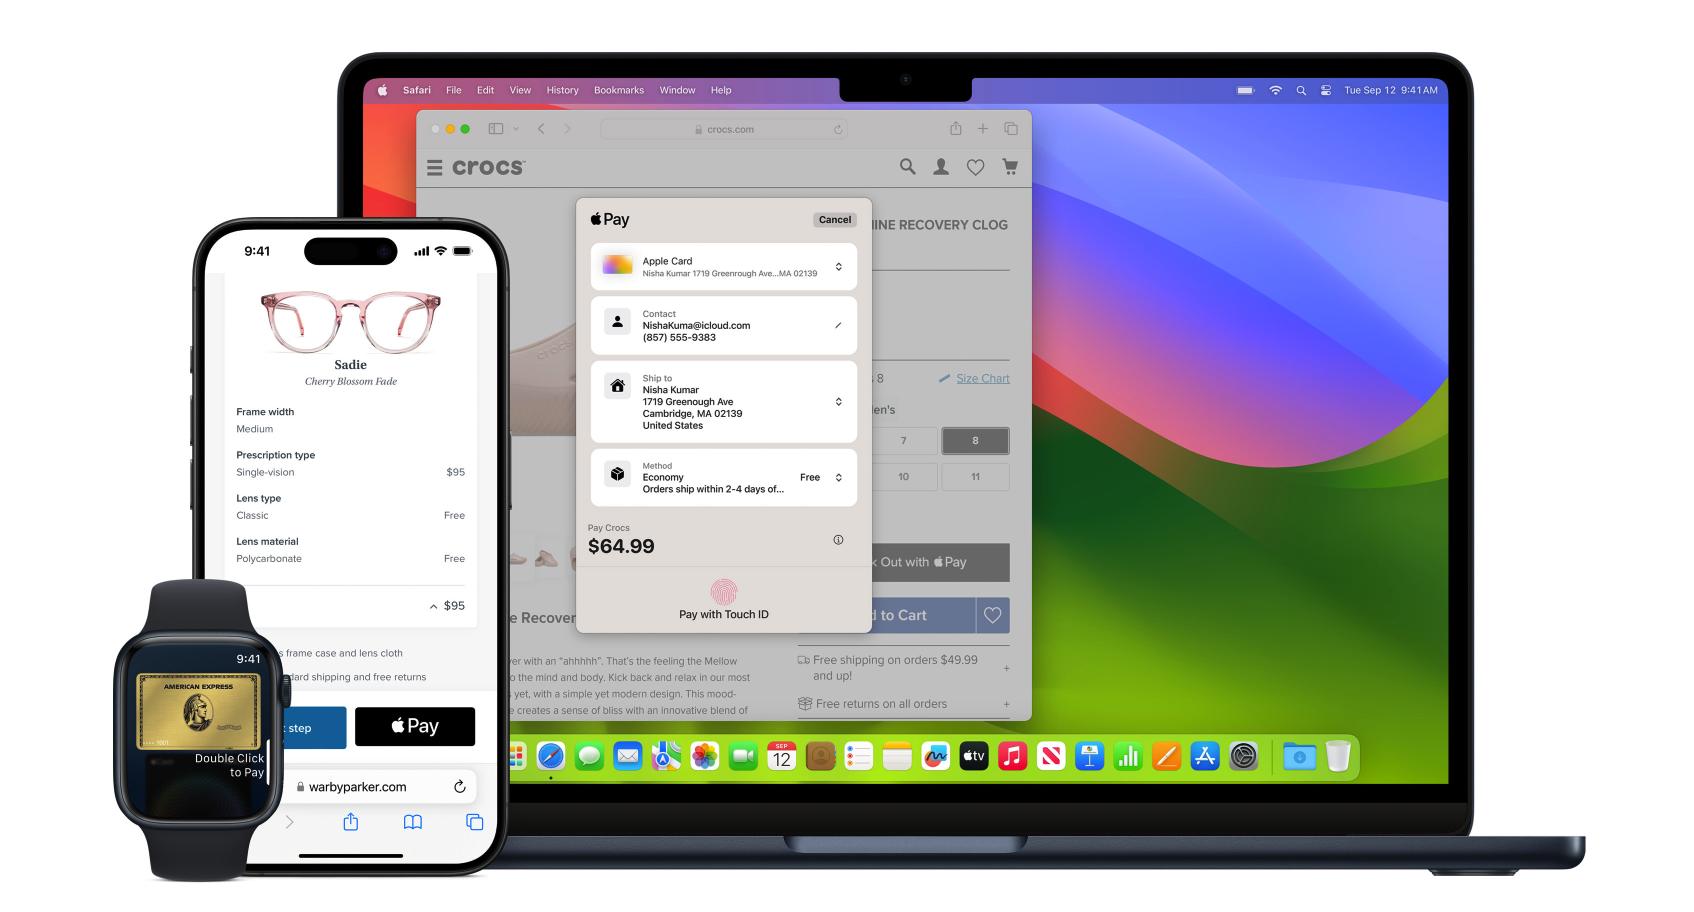
Normally paying for something is fine, but slightly annoying to have to type in all the numbers. Apple Pay has your information saved, so it is a one-click payment solution.
- You click the Apple Pay button.
- Use a biometric marker like Touch ID or Face ID to confirm the payment.
- Done.
It goes from being a slightly annoying experience to almost enjoyable. There is even a satisfying little ding to tell you it was successful.
There is also a nice interface for package tracking, but it is not widely used. I have used Apple Pay regularly for a few years and have never seen it track my package.
How it Works
The financial infrastructure everywhere in the world is very complex. Partly because it has to be super secure, since it’s people’s money, and partly because innovation moves slowly and has to accommodate old technology.
Don’t worry, the new crypto coin $BINGUS is going to fix that. (Not Financial Advice, it’s just a joke, pls don’t buy this)
Apple Pay has to work within the current financial system. Even though the transaction experience happens in a second or two, your information travels through many different systems and goes through many different confirmations for the payment to go through successfully.
We’ll cover each part from a very high level, but each of these parts could be an article on its own.
Secure Element
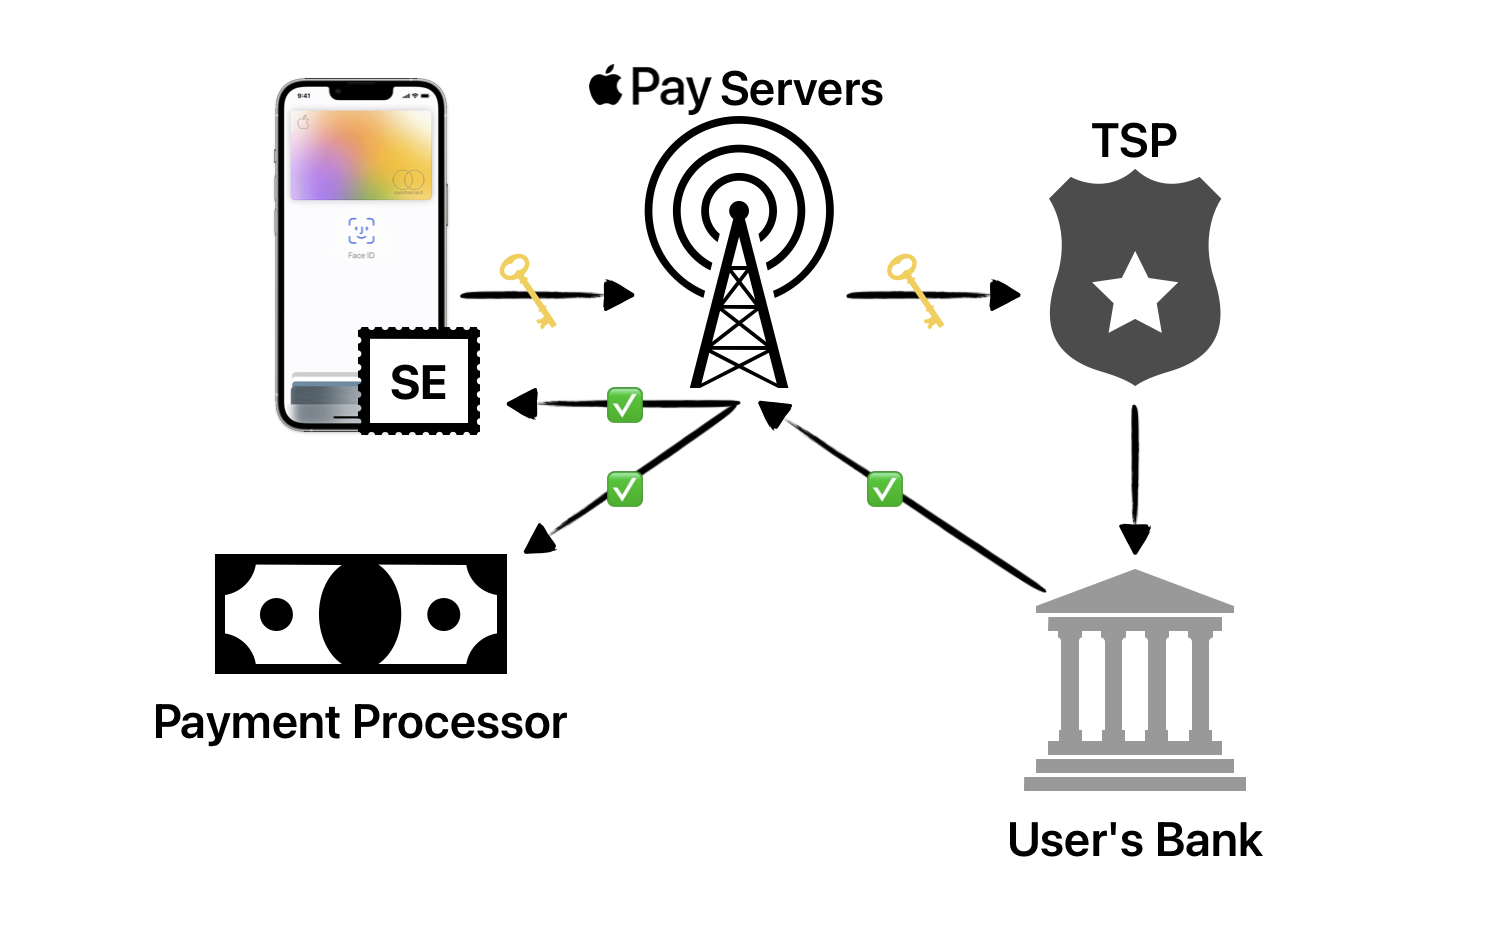
Each device that supports Apple Pay has a chip inside called the Secure Element (SE). This is a completely separate piece of hardware that is separated from the main processor to be a physical security barrier. This chip has so many different security measures like Tamper Resistance, and cryptographics to make sure your card information is safe.
When an Apple Pay Transaction is initiated, the Secure Element creates a payment token. This payment token is a secure way to initiate payments because even if someone gets access to it, they can’t extract any information from it.
Apple Pay Servers
Apple has built a server network specifically for Apple Pay that acts like a middleman for all these transactions. When they receive the Apple Pay request the servers will forward that payment token to a Token Service Provider (TSP) and then wait for a confirmation of an authorized purchase from the user’s bank.
Once the Apple Pay servers receive the notification that the purchase has been authorized, the users get a checkmark and a nice ding sound on their device that the payment went through.
Technically the payment hasn’t gone through at this moment. While the user was getting notified of a successful purchase the merchant’s payment processor received a similar notification that the user’s bank had authorized the purchase. The actual processing of the payment can take a few hours to a few days.
This is why you see purchases as “pending” on your bank statements.
Token Service Provider
The token is not very useful to the user’s bank. That’s where the Token Service Provider (TSP) comes in. TSPs take the token information and retrieve the account number and details that the bank needs to authorize the transaction.
Add Apple Pay to Your App
Thankfully you don’t need to worry about that whole process when you are implementing Apple Pay. Apple handles most of that load, but there are a few security measures that are taken during the implementation.
As the saying goes, you need to spend money to make money. So you will need an Apple Developer account for this. If your app idea is good enough you should be able to make this money back.
1. Register App ID
An App ID is used to identify the specific app that you are building. To create one go to the Certificates, Identifiers, & Profiles section on the Apple developer portal, select Identifiers, and make sure you are on the App IDs filter.
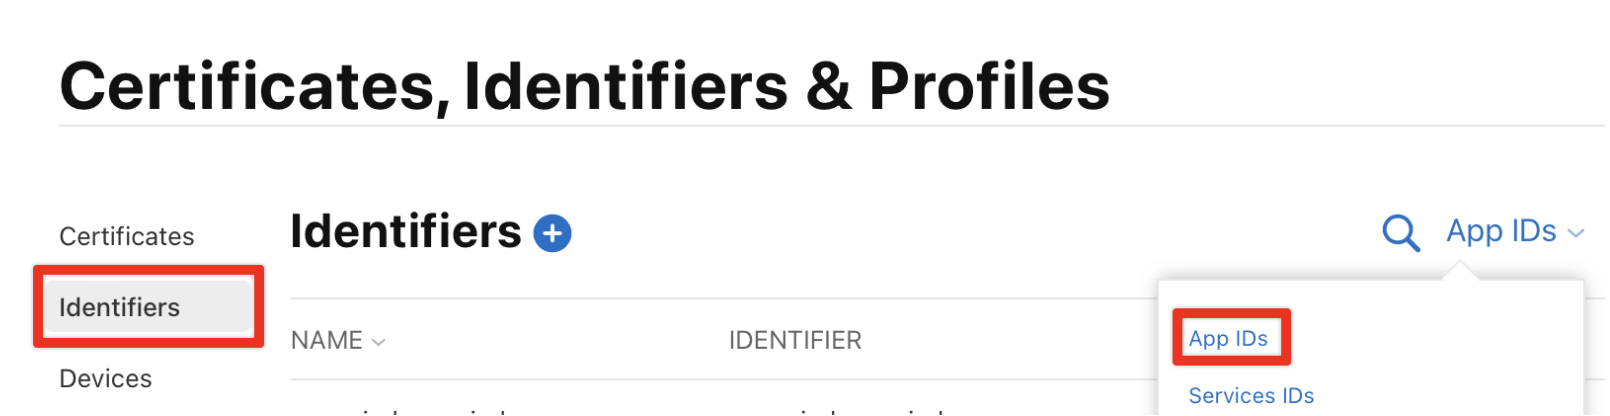
Click the blue plus icon, to add a new App ID, select the App IDs option, and an app type. Once you get to the below screen, it’s very important that you put the same bundle identifier as the bundle identifier on the actual app you’re building (you can find it in XCode). Specifically, to implement Apple Pay, you need to select the Apple Payment Processing option.

2. Merchant ID
The Merchant ID is an identifier of the entity accepting the payments. This process verifies your business identity and ensures that only valid merchants can accept payments.
After you register your App ID, the portal will lead you back to the Certificates, Identifiers, & Profiles page where you should switch to the Merchant IDs filter.
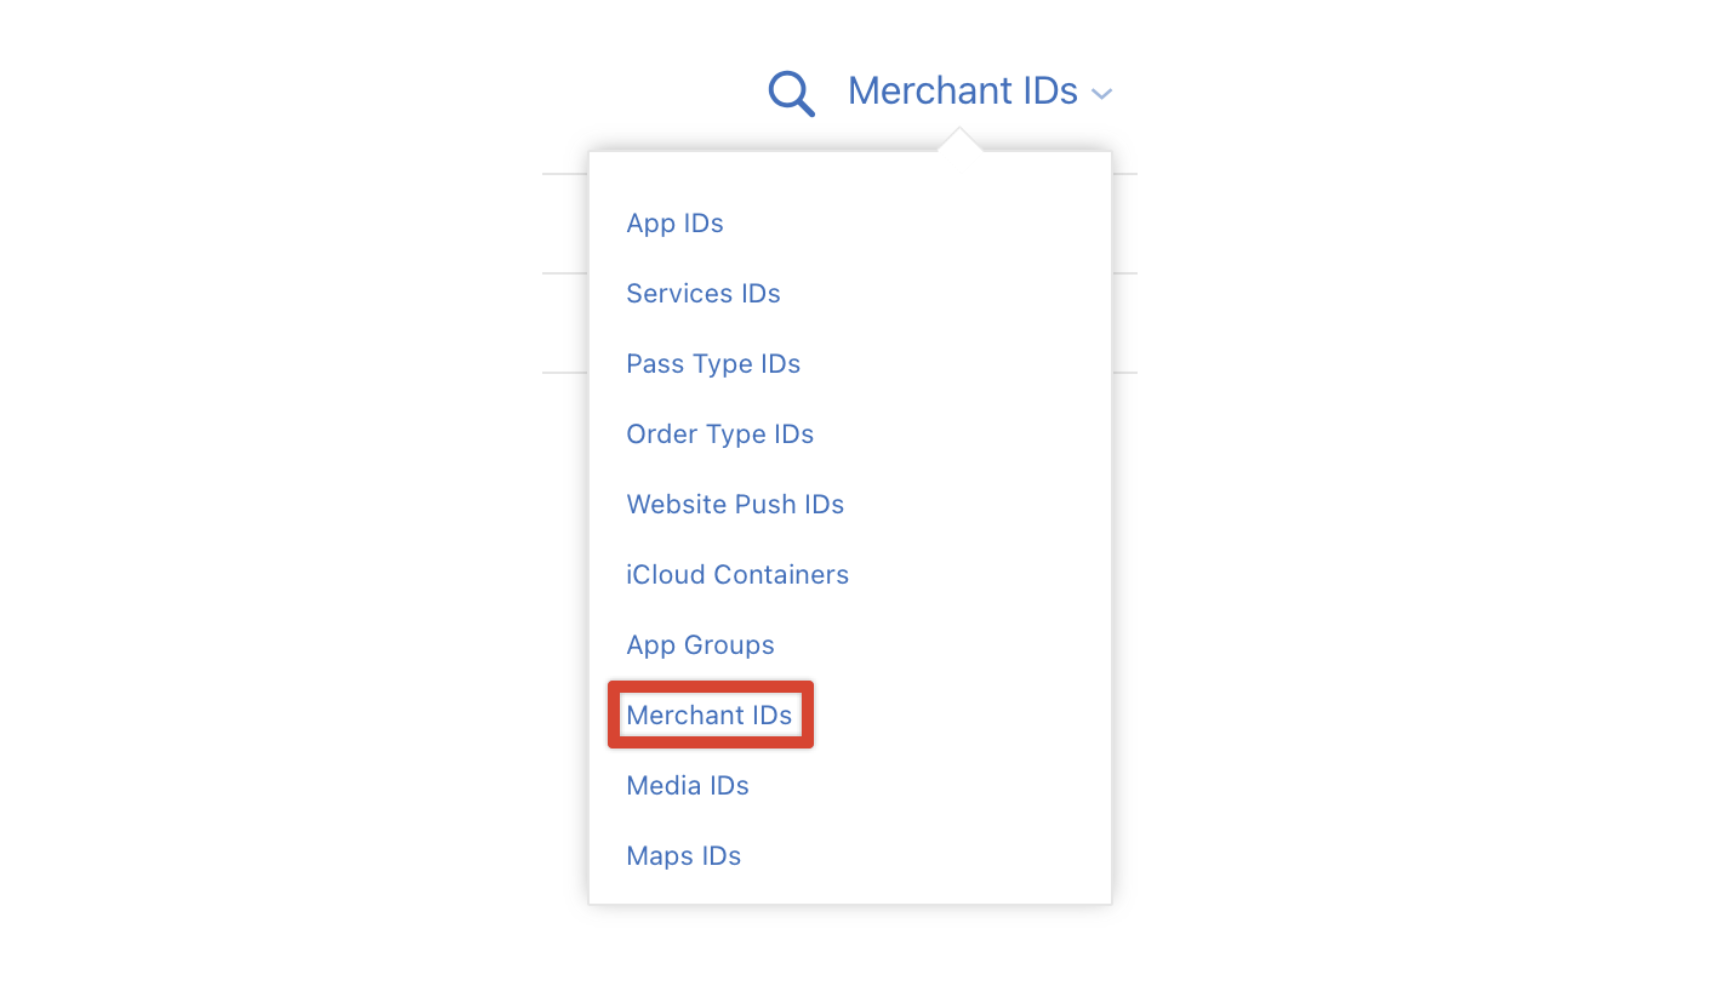
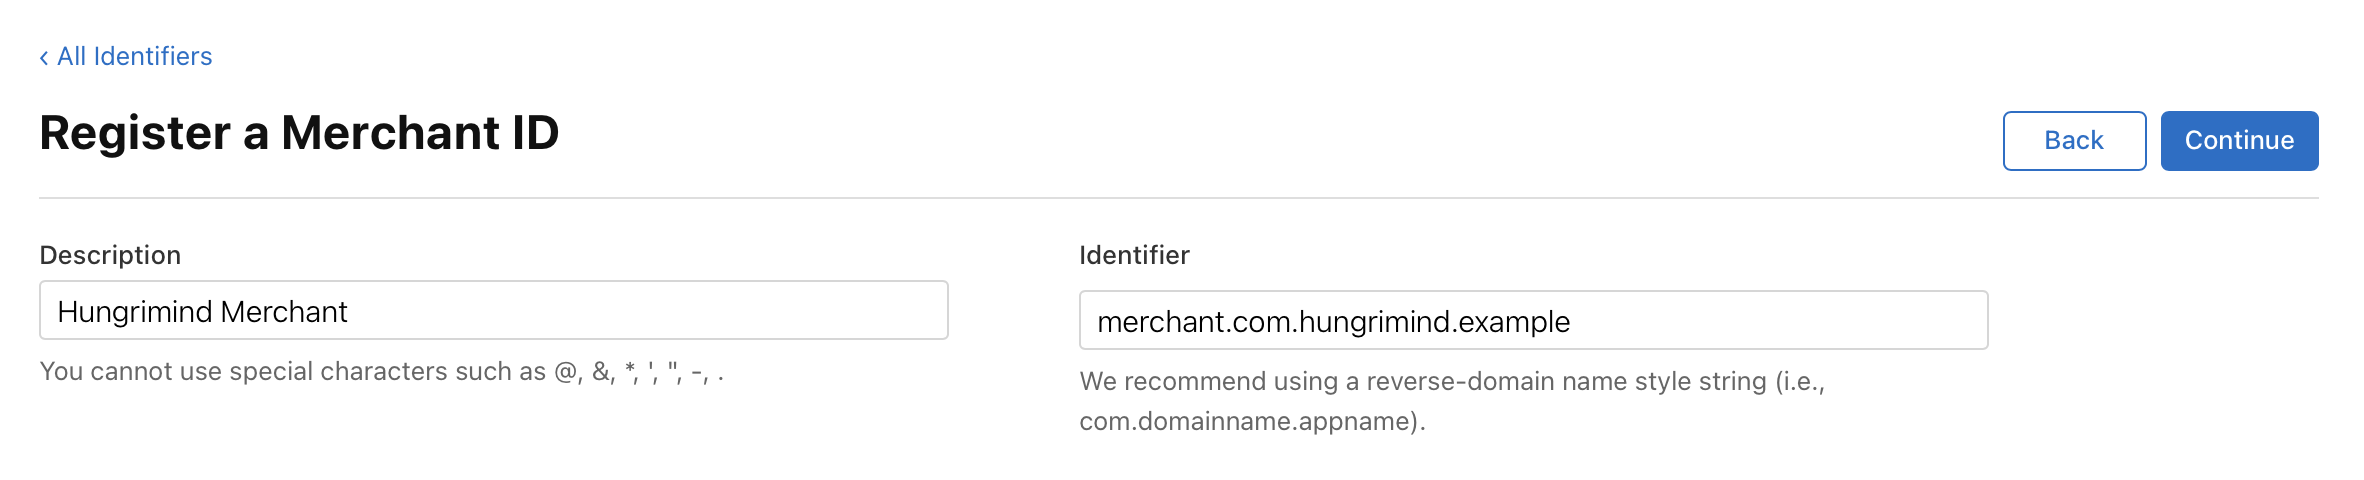
And once again, click the blue plus icon to create a new Merchant ID. Make sure the Merchant IDs option is selected and you’ll be taken to the registration screen. This time you can choose whatever identifier you want, but it is recommended to follow Apple’s convention.
3. Apple Pay Processing Certificate
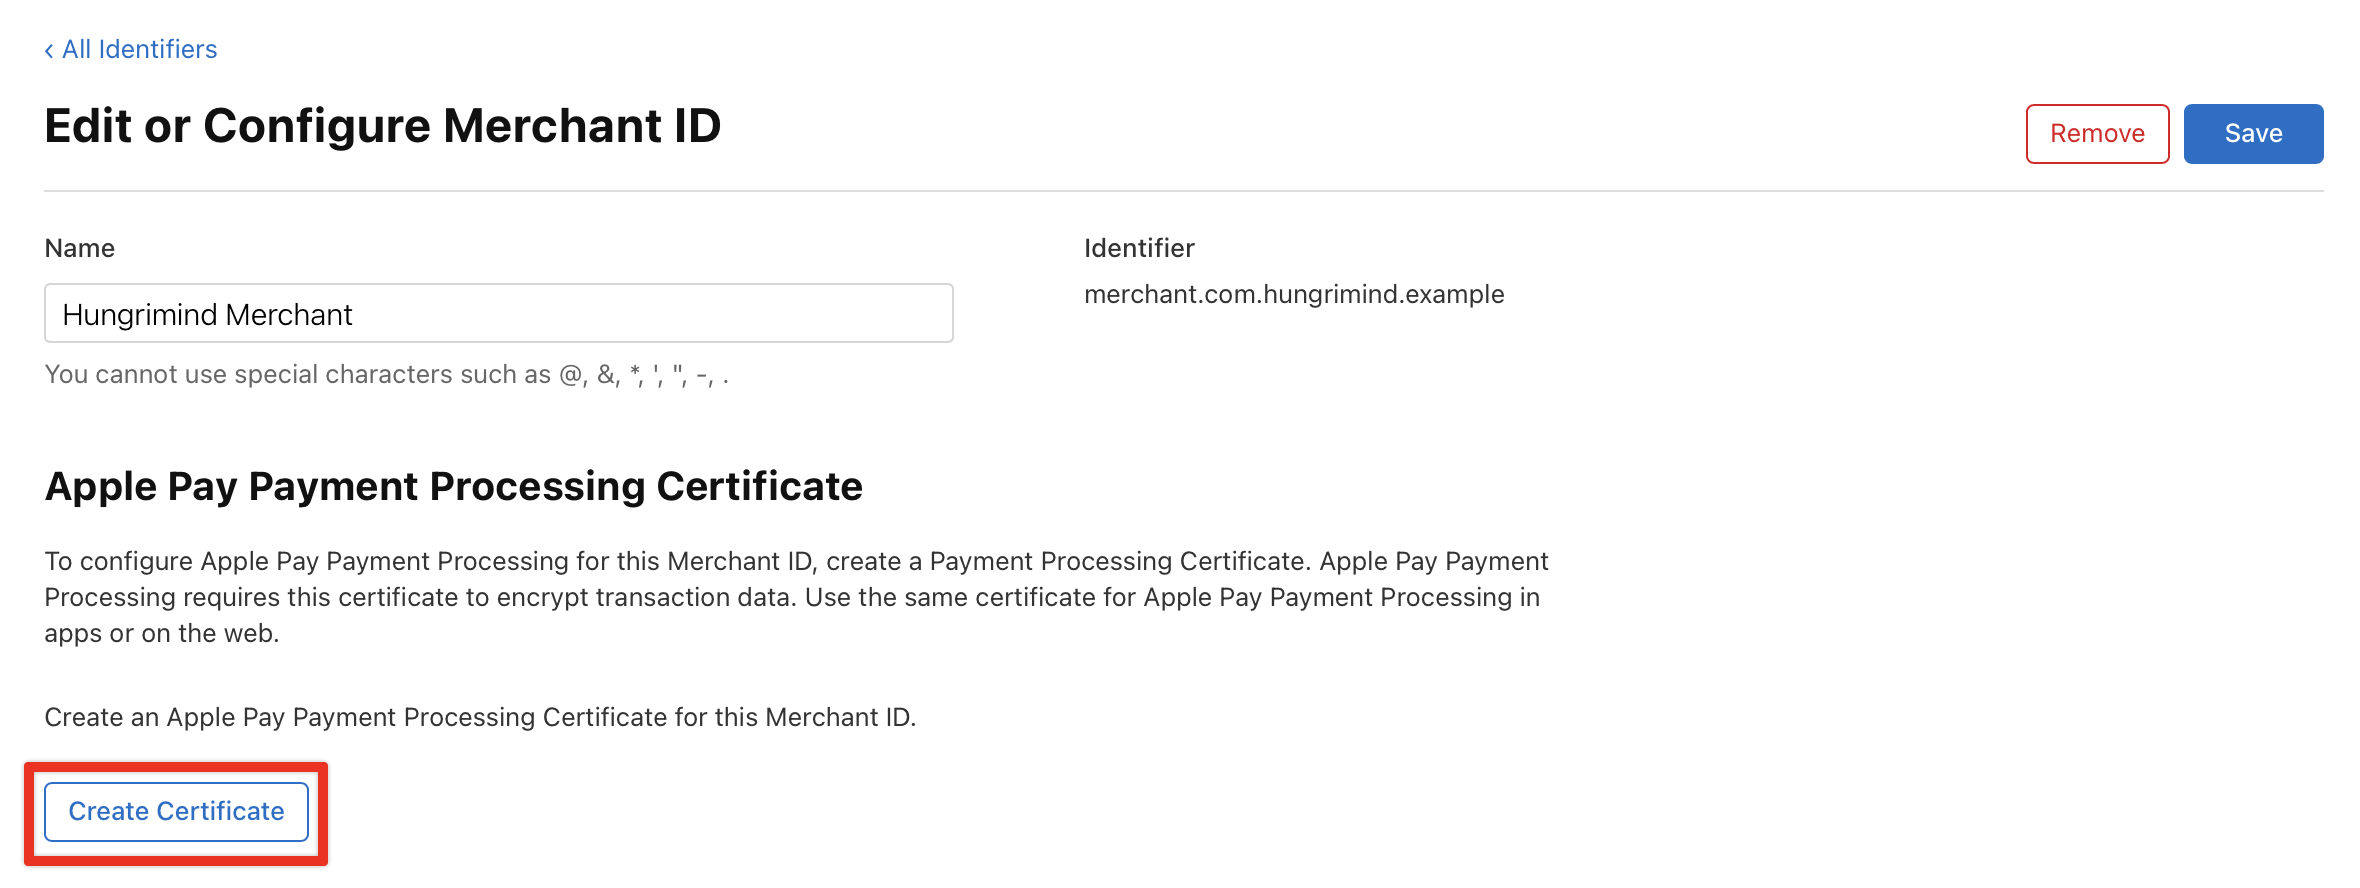
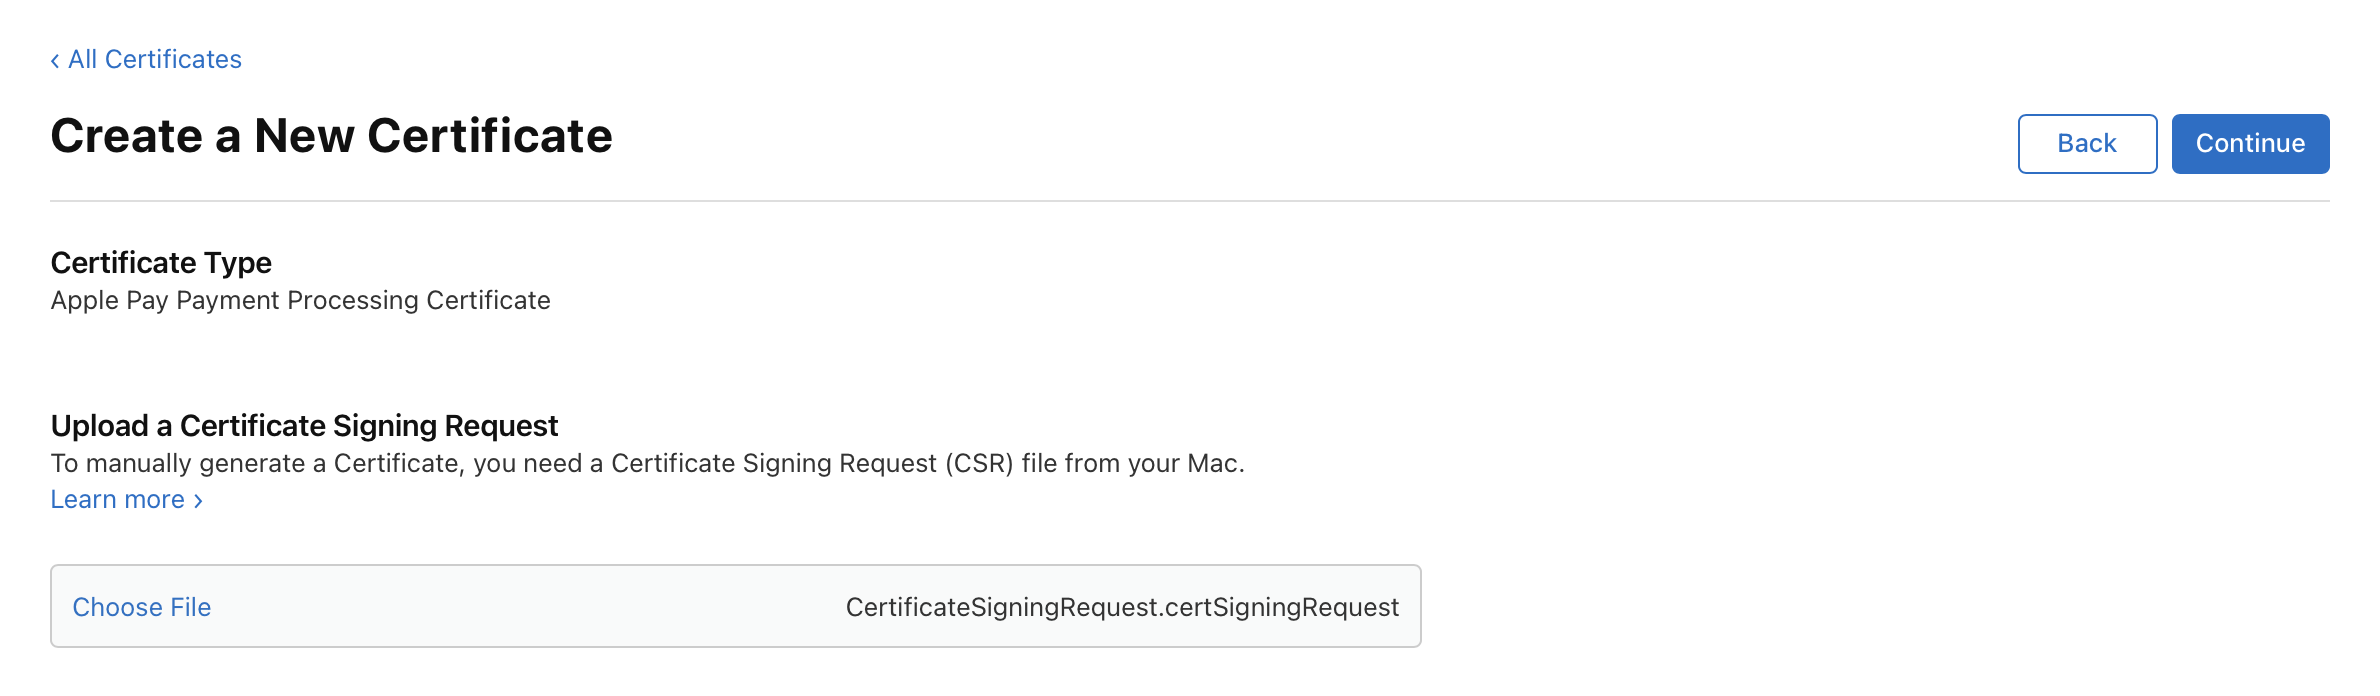
The certificate is necessary to encrypt transaction data. To create one you need to go to the Certificates tab and once again click the blue plus icon. Under Services select the Apple Pay Payment Processing Certificate, select the Merchant ID we just created and it will lead you to this screen, where you will need to create the certificate.
4. CSR for a Certificate
Once you have clicked the button highlighted above, you will need to upload a Certificate Signing Request (CSR) file from your Mac. To do this you need to open the Keychain Access application which should be installed on your Mac by default.
In the toolbar select Keychain Access > Certificate Assistant > Request a Certificate from a Certificate Authority and you should see the below screen. Add your email and name, select Saved to disk, and Let me specify key pair information.
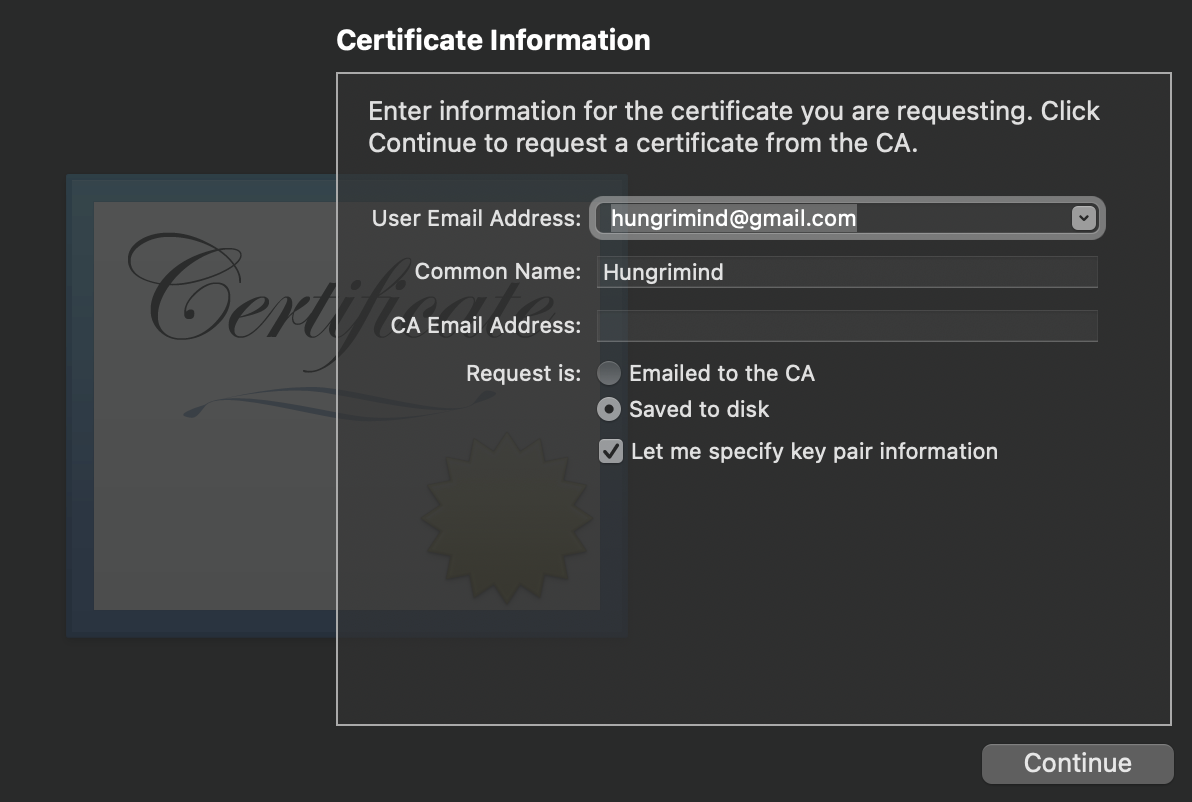
Click continue and for the key pair information change Algorithm to ECC and Key Size to 256 bits
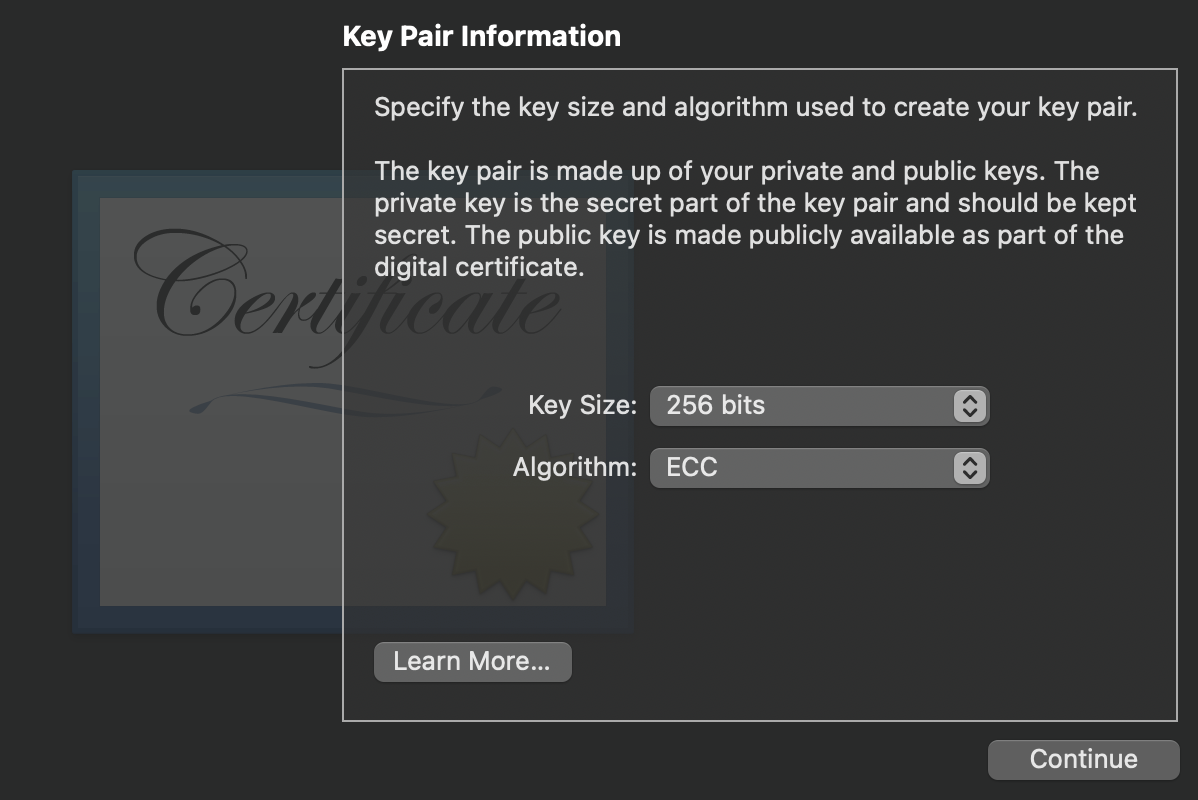
This will save a CSR file to your specified location.
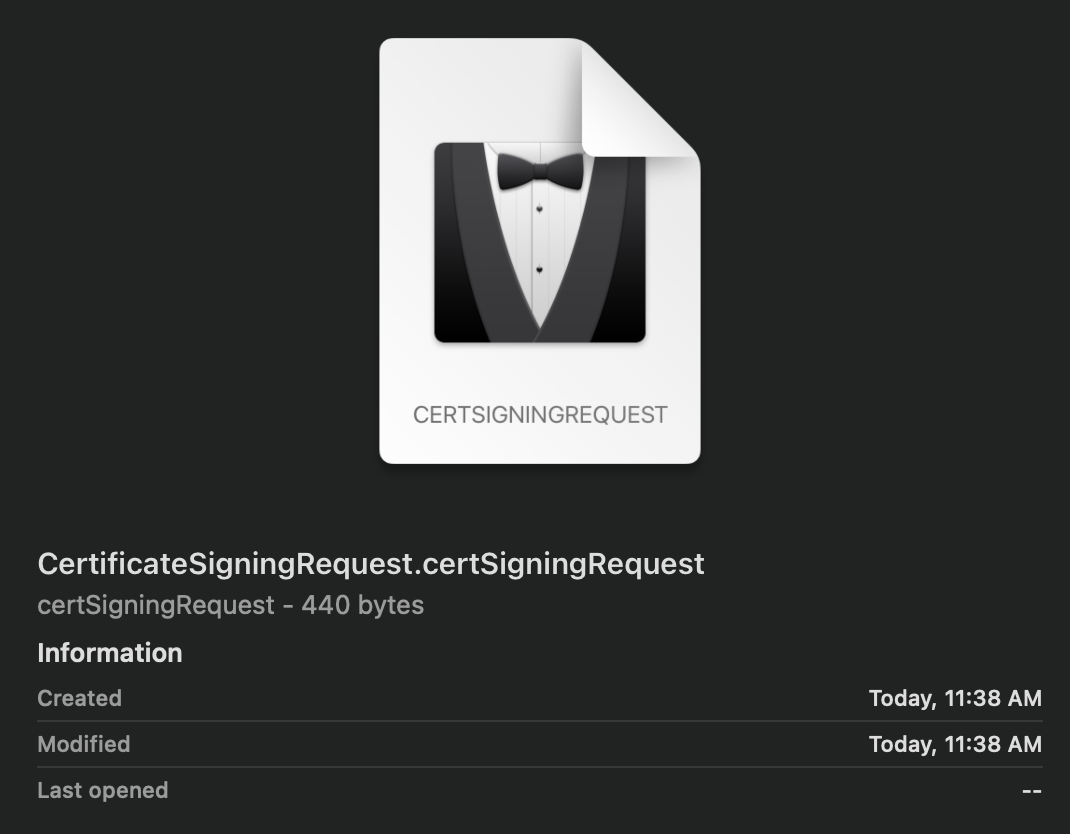
Upload it to our Apple Pay Processing Certificate.
5. Apple Pay Capability
Everything we did until now was to get our documents in order. The last step is to add the Apple Pay capability to our application. Open up your XCode project, select Runner, and then Signing & Capabilities.
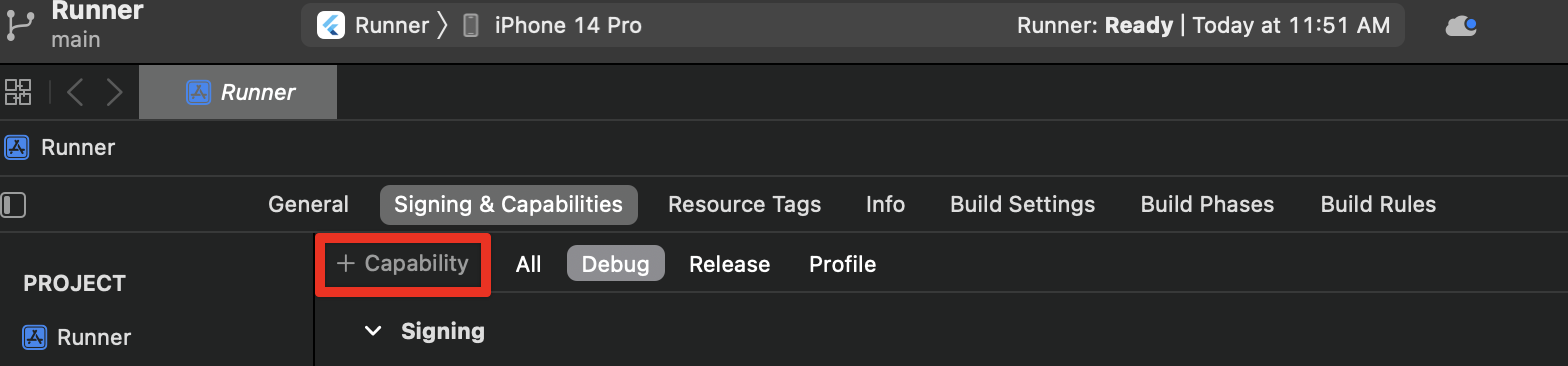
Select Apple Pay and choose the Merchant ID that corresponds with this project.

Note: The
Bundle Identifierfor this specific project must be a registered App ID on the Apple developer site. That was what we did in Step #1, so make sure that’s the same app, or redo Step #1 for this specific app.
What is a Merchant ID and Certificate?
What the heck did we just even do? To be able to accept payments you need to have an Apple Developer account and be a “verified” merchant in Apple’s system. The Payment Processing Certificate is tied directly to that Merchant ID and is used for encrypting the payment data that is being sent. The Apple Pay servers use the certificate to encrypt that payment data, and then your payment service provider can use it to decrypt that data. So all of this was done in the name of security.
Add it to Your Flutter App
You will need to add the pay package to your Flutter application and create an Apple Pay configuration.
You can find the complete list of parameters for the configuration in the Apple Pay Documentation. Here is a basic example:
const String defaultApplePay = '''{
  "provider": "apple_pay",
  "data": {
    "merchantIdentifier": "merchant.com.hungrimind.example",
    "displayName": "Hungrimind Store",
    "merchantCapabilities": ["3DS", "debit", "credit"],
    "supportedNetworks": ["amex", "visa", "discover", "masterCard"],
    "countryCode": "US",
    "currencyCode": "USD",
    "requiredBillingContactFields": ["emailAddress", "name", "phoneNumber", "postalAddress"],
    "requiredShippingContactFields": [],
    "shippingMethods": [
      {
        "amount": "4.99",
        "detail": "5-8 Business Days",
        "identifier": "flat_rate_shipping_id_2",
        "label": "UPS Ground"
      }
    ]
  }
}''';
The very last step is to add the Apple Pay button that is provided by the pay package to your application. Here is a simple example:
ApplePayButton(
    paymentConfiguration: PaymentConfiguration.fromJsonString(defaultApplePay),
    paymentItems: const [
        PaymentItem(
            label: 'Total',
            amount: '0.01',
            status: PaymentItemStatus.final_price,
        )
    ],
    style: ApplePayButtonStyle.black,
    type: ApplePayButtonType.book,
    onPaymentResult: (result) {
        //add what you want to happen after the purchase is made
    },
    loadingIndicator: const Center(
        child: CircularProgressIndicator(),
    ),
),
Apple Pay is a very complex system that goes through many other complex systems, and because of that, for the end user, it is the simplest payment system they have ever used. To add it to your Flutter application it takes a few security steps to allow your apps to accept the payments, but once those are done, the implementation is straightforward.
Dive Deeper
Apple also has other APIs that make the end user’s experience smooth. For example, it would be weird to support Apple Pay in your application and not have Apple Sign In.
Learn about Apple Sign In by taking the Ultimate Login System course below. This course covers how to create a login system using the latest state management technologies, and implements Apple Sign In within that system. And just like all courses it goes into great detail to make sure you understand each part, while also being fun and interactive.