Introduction
Most Flutter developers don’t struggle with writing code. They struggle with reading it’s specially six months later. In this post, we will explore three concepts that will help you build maintainable apps and make your future self happier.
Concept 1: State Management
Let’s start with principle one, which is state and how you would go about managing it.
setState
State management typically begins with setState and then progresses into using a state management package.
Provider, Riverpod or even bloc
That package can be Provider, Riverpod, bloc, or any other general state management package.
These all come with their own different recommended approaches on how you should handle state. But we have everything we need already.

ValueNotifier and ChangeNotifier exists
For state within a widget, we have setState. For state within a wider architecture, you can use ChangeNotifier or ValueNotifier. Both of these notify the view whenever the data changes.
// setState examplesetState(() { count++; });
// ChangeNotifier exampleclass CountingModel extends ChangeNotifier { int value = 0; void increment() { value++; notifyListeners(); }}
// ValueNotifier exampleValueNotifier<int> countNotifier = ValueNotifier(0);Within the view, we can listen to these notifications with a ListenableBuilder or ValueListenableBuilder. This would then cause the builder to rebuild the child widgets.
// Listen to ChangeNotifierListenableBuilder( listenable: countingModel, builder: (_, __) => Text('${model.value}'));
// Listen to ValueNotifierValueListenableBuilder<int>( valueListenable: countNotifier, builder: (_, count, __) => Text('$count'));State management doesn’t have to be hard. The difficult part with state is how you would go about the architecture around it, and that leads us into the second concept.
Concept 2: Architecture
The architecture drives the flow of your application. Flutter recommends MVVM, which is what we cover in our course. We teach a similar architecture with some quality of life improvements.
MVVM
Remember, an architecture should be able to scale from a simple hobby project to an enterprise situation without introducing lots of layers initially to support it.
In reality, most projects don’t make it to the enterprise step, so don’t overcomplicate your life.
You should think of the architecture as a guideline on how you structure your code, not rules. It should be able to be done with the minimal amount of code and be able to scale in complexity and support as you need it.
If you have a view such as a page, you would put the business logic in a class referred to as a view model. This class would contain ValueNotifiers around the state you want to have.
You then instantiate the view model within the view and use a ValueListenableBuilder to react to those state changes.
class ViewModel { final countNotifier = ValueNotifier(0); void update() => count.value++;}
class _State extends State<MyPage> { late final vm = ViewModel();
@override Widget build(BuildContext c) => ValueListenableBuilder( valueListenable: vm.countNotifier, builder: (_, count, __) => Text('$count'), );}This architecture allows you to scale up the layers if wanted. This could be a repository layer. A repository is a class that interacts with outside sources. A repository can be added to this architecture without affecting the rest of the code. The repository can then be used throughout the application using a service locator.
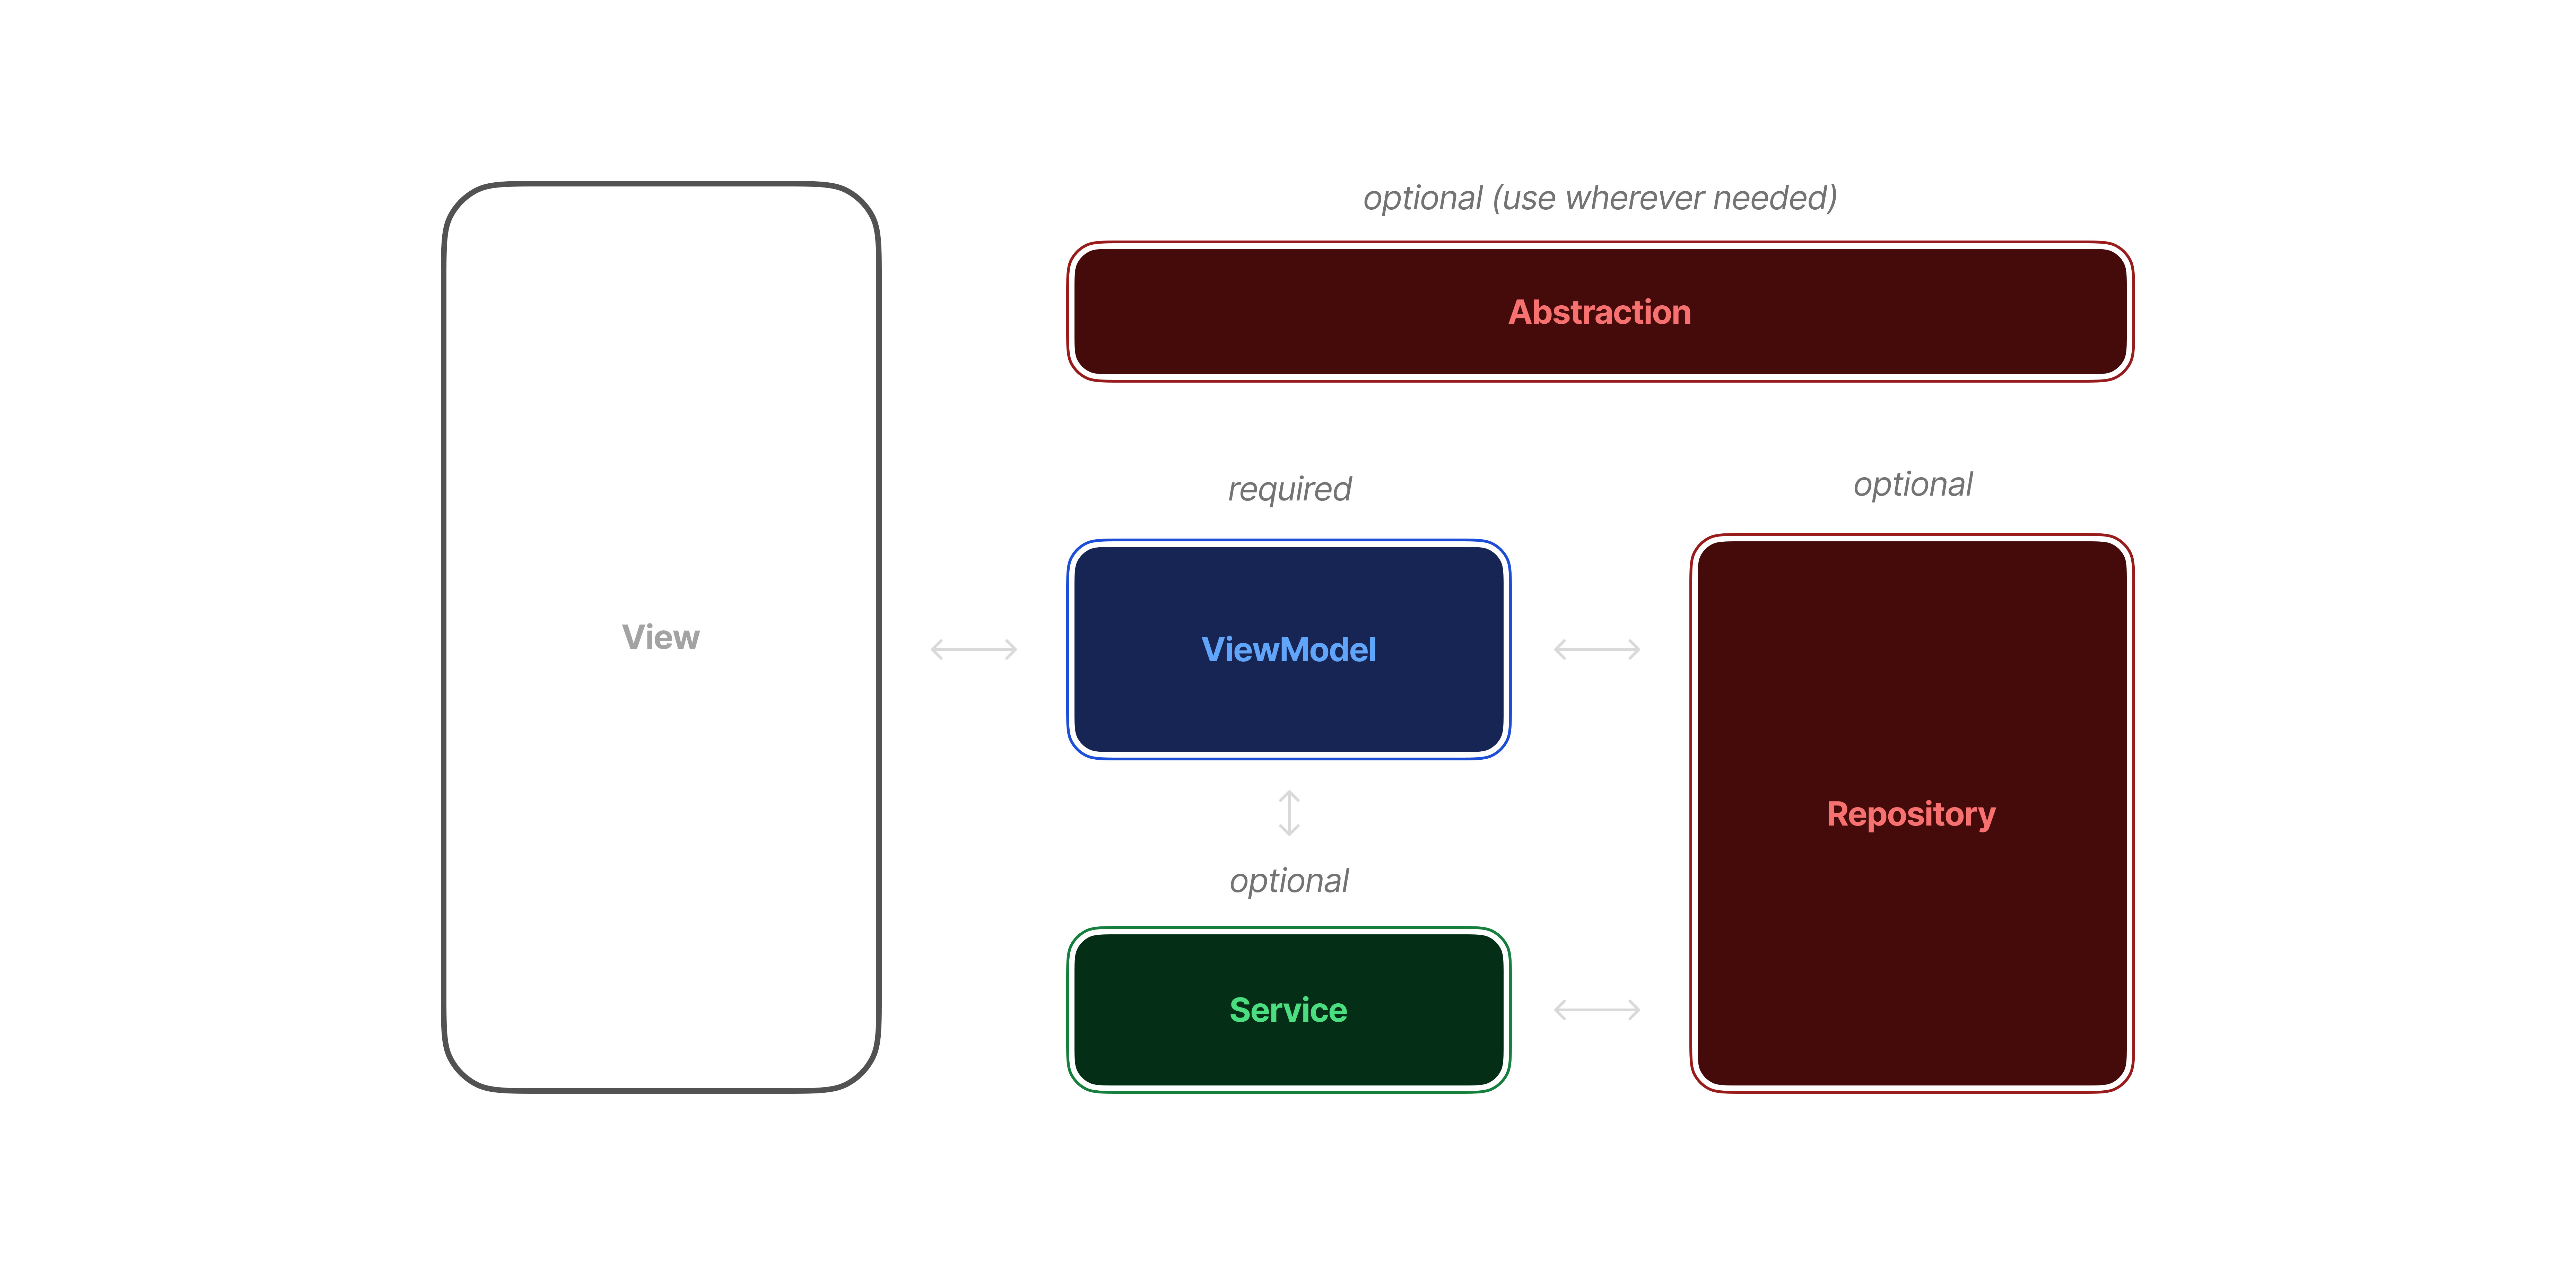
If you want to manage state in an app-wide approach, which we call a service, you can create a class, add the state, and expose it to your different view models. There you have a simple and effective way for app-wide state.
class CountService { final countNotifier = ValueNotifier(0); void update() => count.value++;}
class _State extends State<MyPage> { late final vm = ViewModel(countService: locator<CountService>());
@override Widget build(BuildContext c) => ValueListenableBuilder( valueListenable: vm.countNotifier, // exposed through a getter builder: (_, count, __) => Text('$count'), );}Concept 3: Automatic Tests
Now for concept three, we have automatic tests. Here you want to cover the widest range possible first.
Have you ever written lots of unit tests only to realize they break on every refactor? This is because the tests are tied to the implementation rather than the input and output. This is also called coupling.

Input and Output
Think of the concept of input and output; that is when you use unit tests.
Action and Result
If you think about action and result, this is when you use widget or integration tests.
For example, instead of writing unit tests for all your view model methods, you can instead write widget tests that verify the interaction between what your user sees and the business logic behind those actions.
void main() { testWidgets('test counter business logic', (WidgetTester tester) async { await tester.pumpWidget(MyApp());
expect(find.text('0'), findsOneWidget); expect(find.text('1'), findsNothing);
await tester.tap(find.byIcon(Icons.add)); await tester.pump();
expect(find.text('0'), findsNothing); expect(find.text('1'), findsOneWidget); });}This approach will allow you to write simple tests that are easy to maintain, give you good confidence, and let you refactor without breaking tests.
Think of your tests as a way to verify your code while reducing the coupling of your test code to your implementation code.
“The goal of testing is to separate the wheat from the chaff, not to tie the two together.” - Kent Beck
Conclusion
In summary, avoid state management packages and use what is included in Flutter. We use a simple and expandable architecture; we use a modified MVVM architecture. Finally, write tests that give you confidence in the code you write.
- Minimize packages
- Use a good architecture
- Tests that do not break
If you want to learn more about testing, read our article on widget vs unit testing.
Get Articles in Your Inbox
Sign up to get the latest articles in your inbox, CEO insights, and free goodies.